
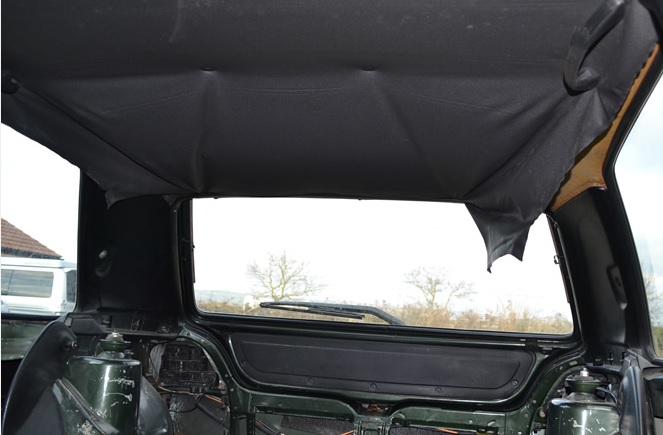
The Golf Mk2 is prone to headliner woes; the most common being the material coming away from the ‘board’ and sagging over the rear occupants heads. With our recent development of brand new Mk2 Golf headliner material, Anna one of our product development team gave re-trimming an original headliner board a go.
Before we continue it should be said, the Mk2 Golf headliner board is very brittle, and pretty big. We’ve scratched our heads for years trying to work out how to reproduce this, and be able to transport it successfully, but sadly we haven’t been able to come up with a solution. So, the next best thing was to reproduce the material to allow enthusiasts to retrim their existing boards.
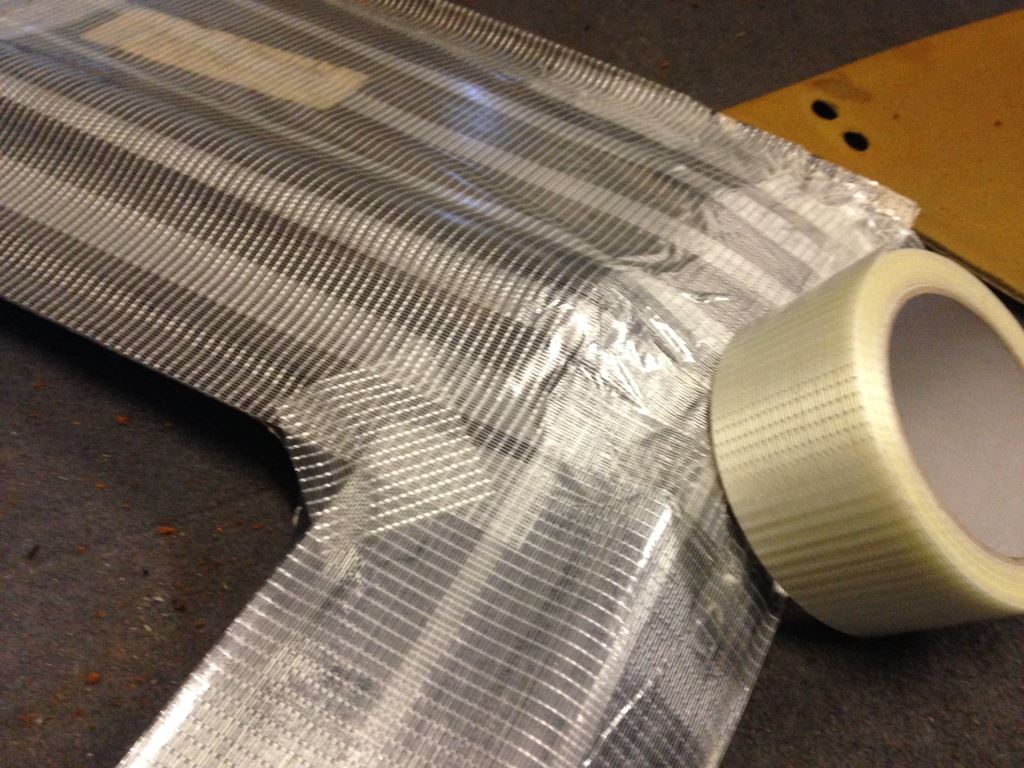
Tools you’ll need. Screwdrivers, Strong cloth tape, newspaper, PVA glue, paint brush, clothes pegs, spray glue, heat gun and some patience. An extra pair of hands for removal would be useful!
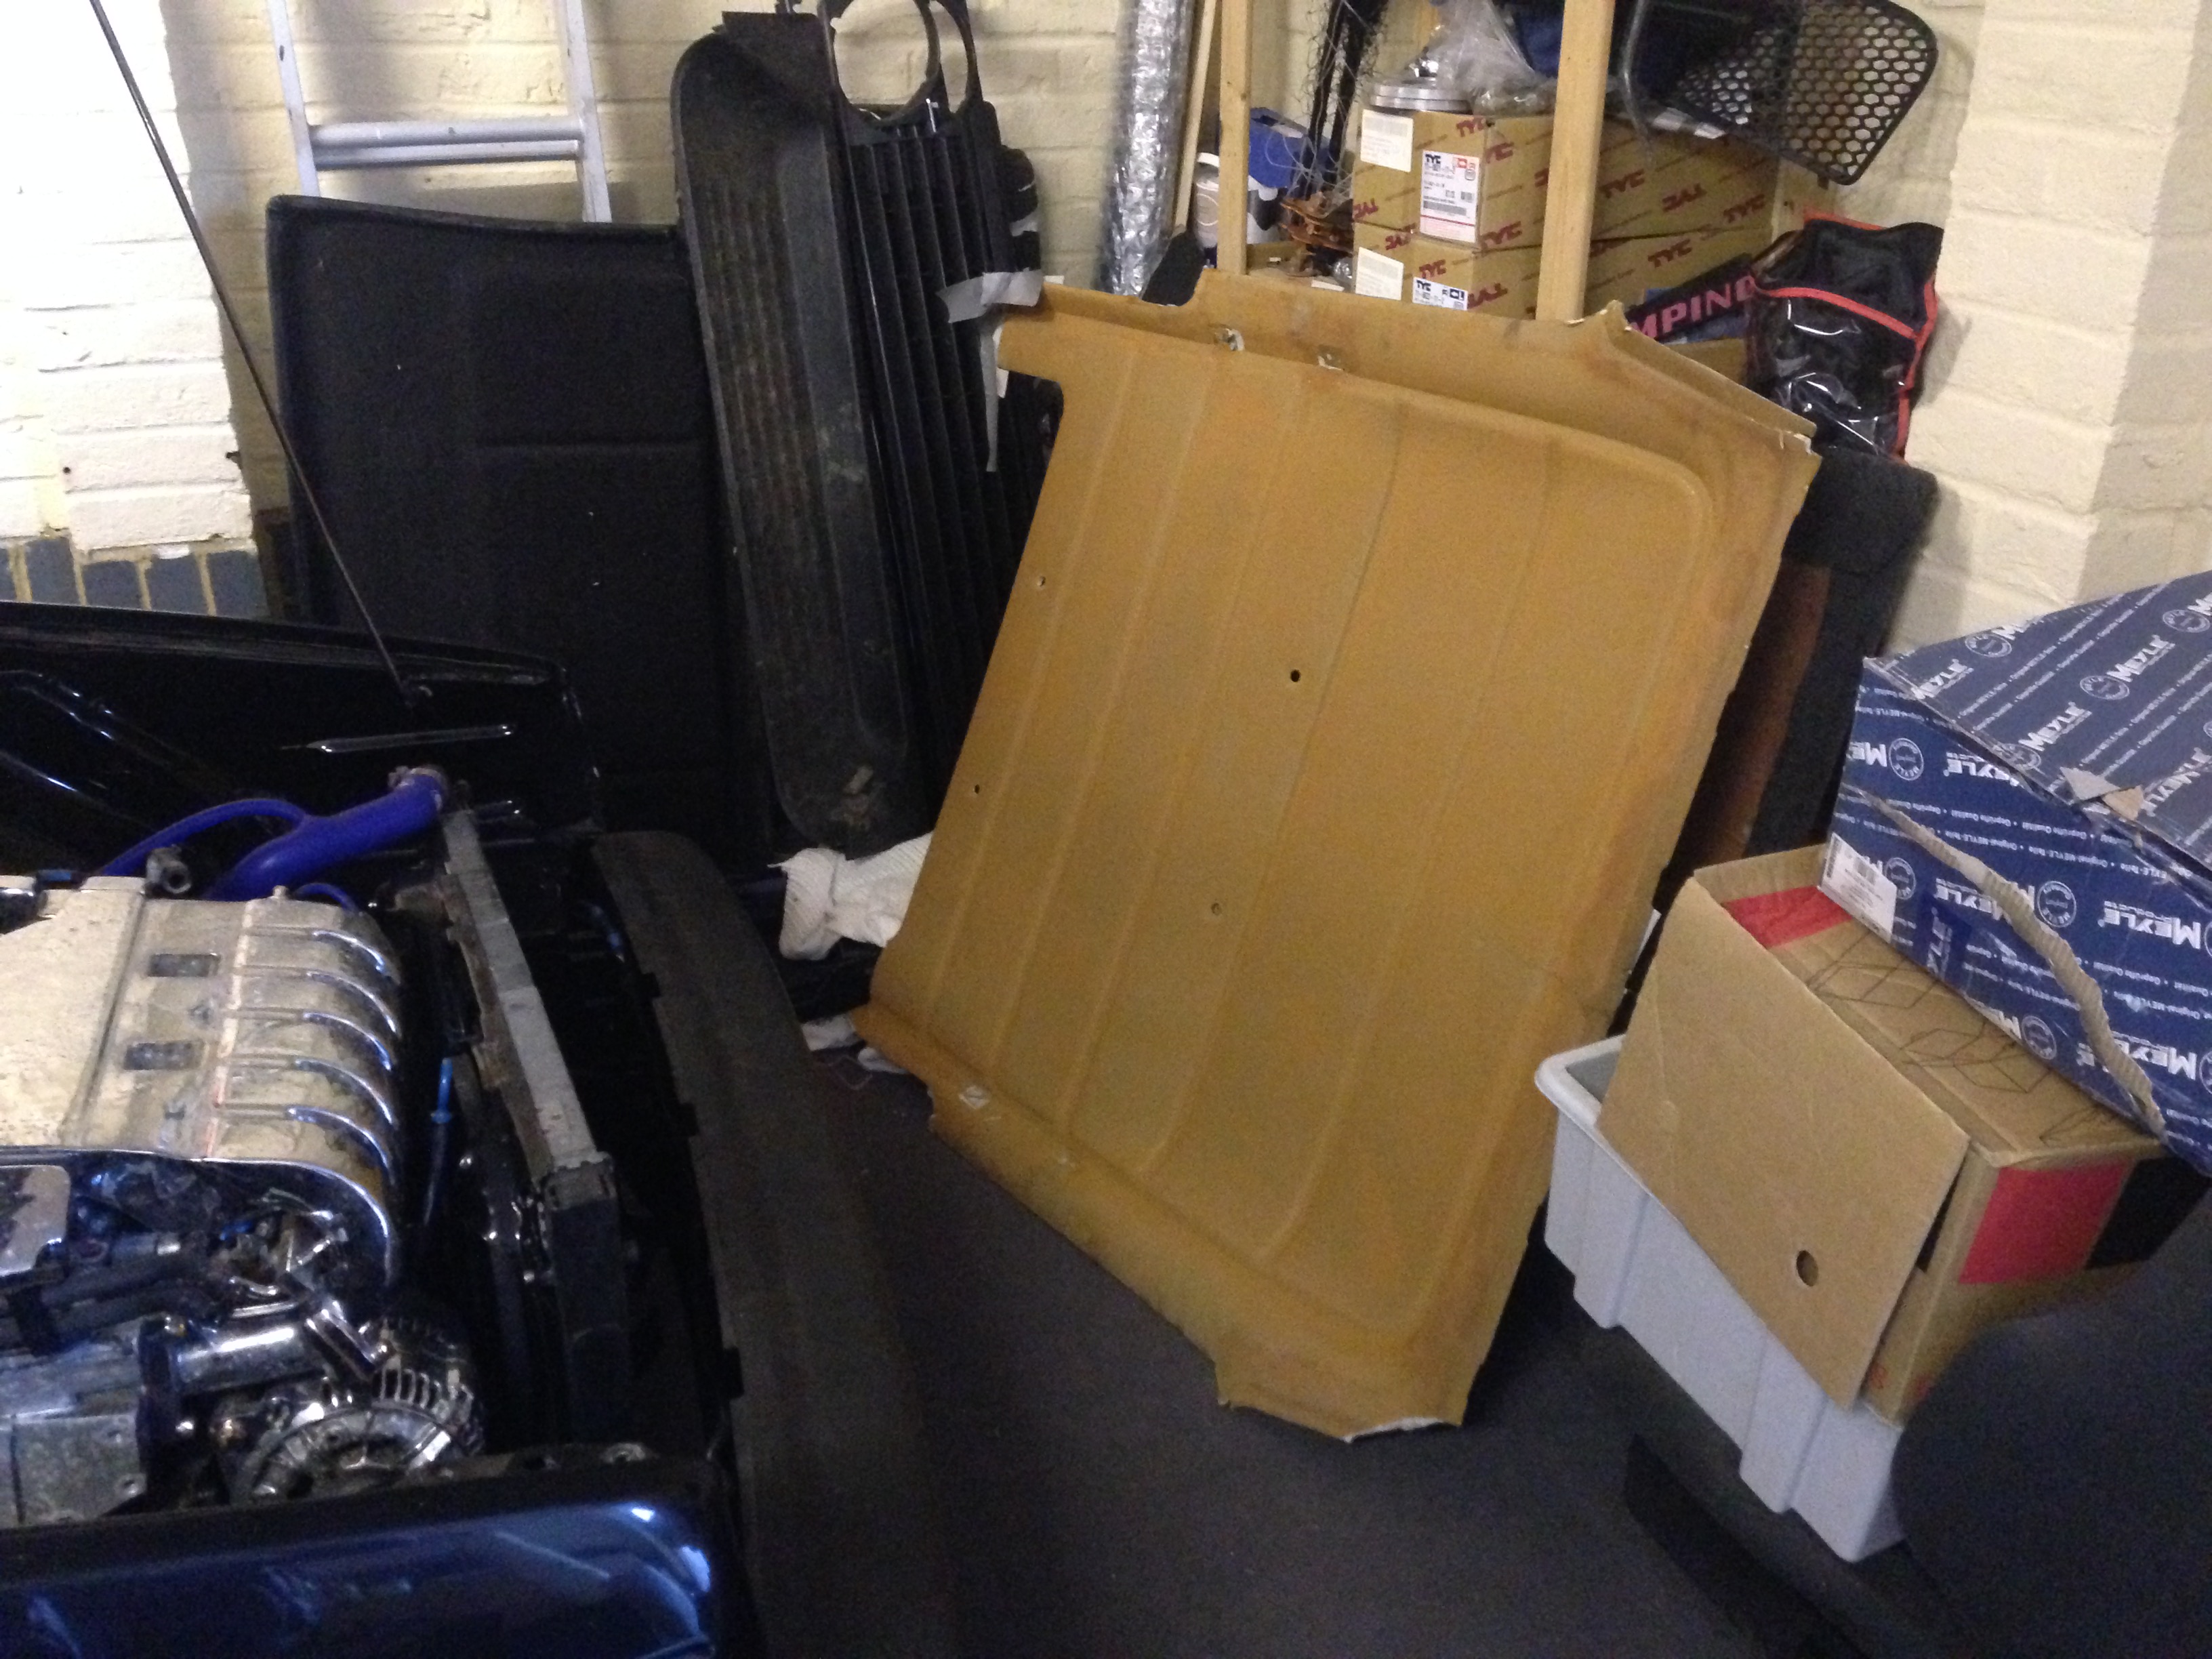
The removal of your old board is fairly straight forward (remove the plastics that are around the pillars and rear hatch, unscrew the sunvisors and grab handles, then drop the interior light and sunroof gubbins if fitted). Lastly gently pry the circular clips out of the lining board and pull the whole thing backwards out through the tailgate aperture.
Do remember when doing this that the board is very fragile, and likely to break into pieces. If you are lucky enough to still have material stuck to it, this may hold it together – if not, it could be worth while using some Gaffa tape to help save it.
For our trial, Anna was delivered a headliner board quite typical of many, as it was in multiple pieces! Before any work could take place though she had to clean off the old headliner foam from the board. Anna did this with sandpaper. Your board will need to be clean of debris for the glue to stick properly.
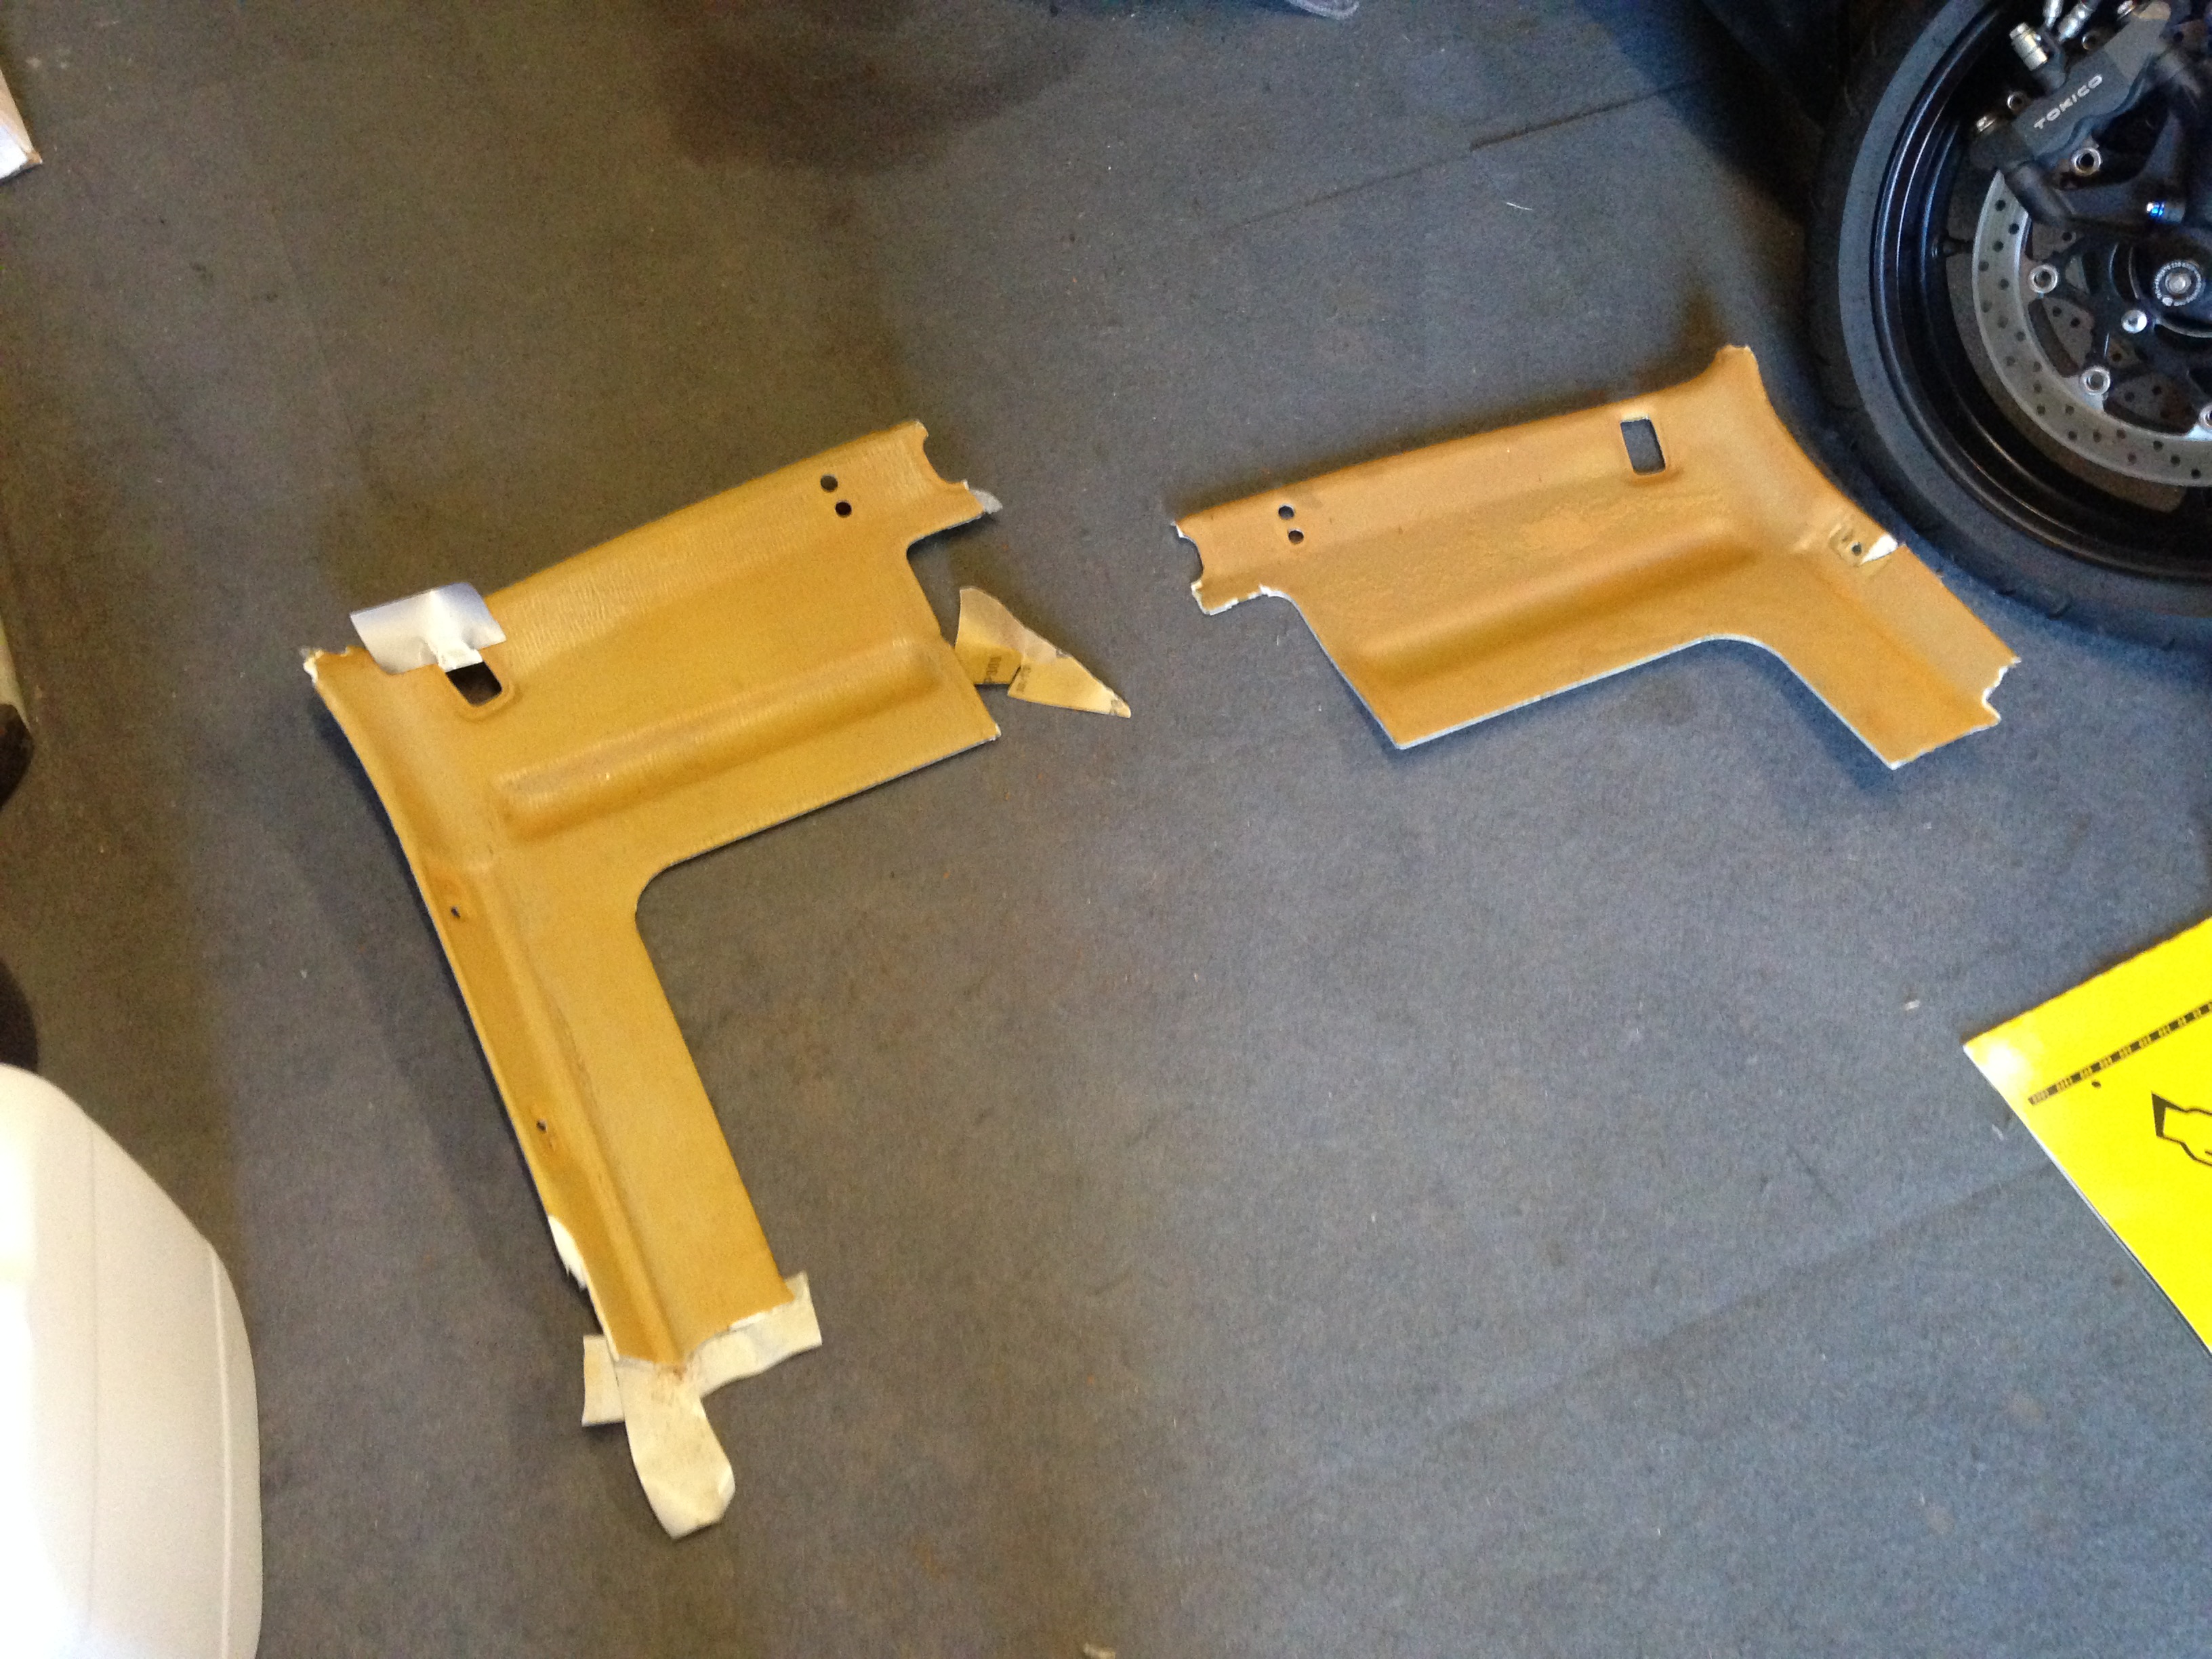
Having known others to repair their headliners with paper mache, it was considered to be a good DIY way to go. For smaller pieces the paper mache would be too fiddly though, so cloth tape would be utilised on the reverse, and then strengthened later on with paper mache on the other side.
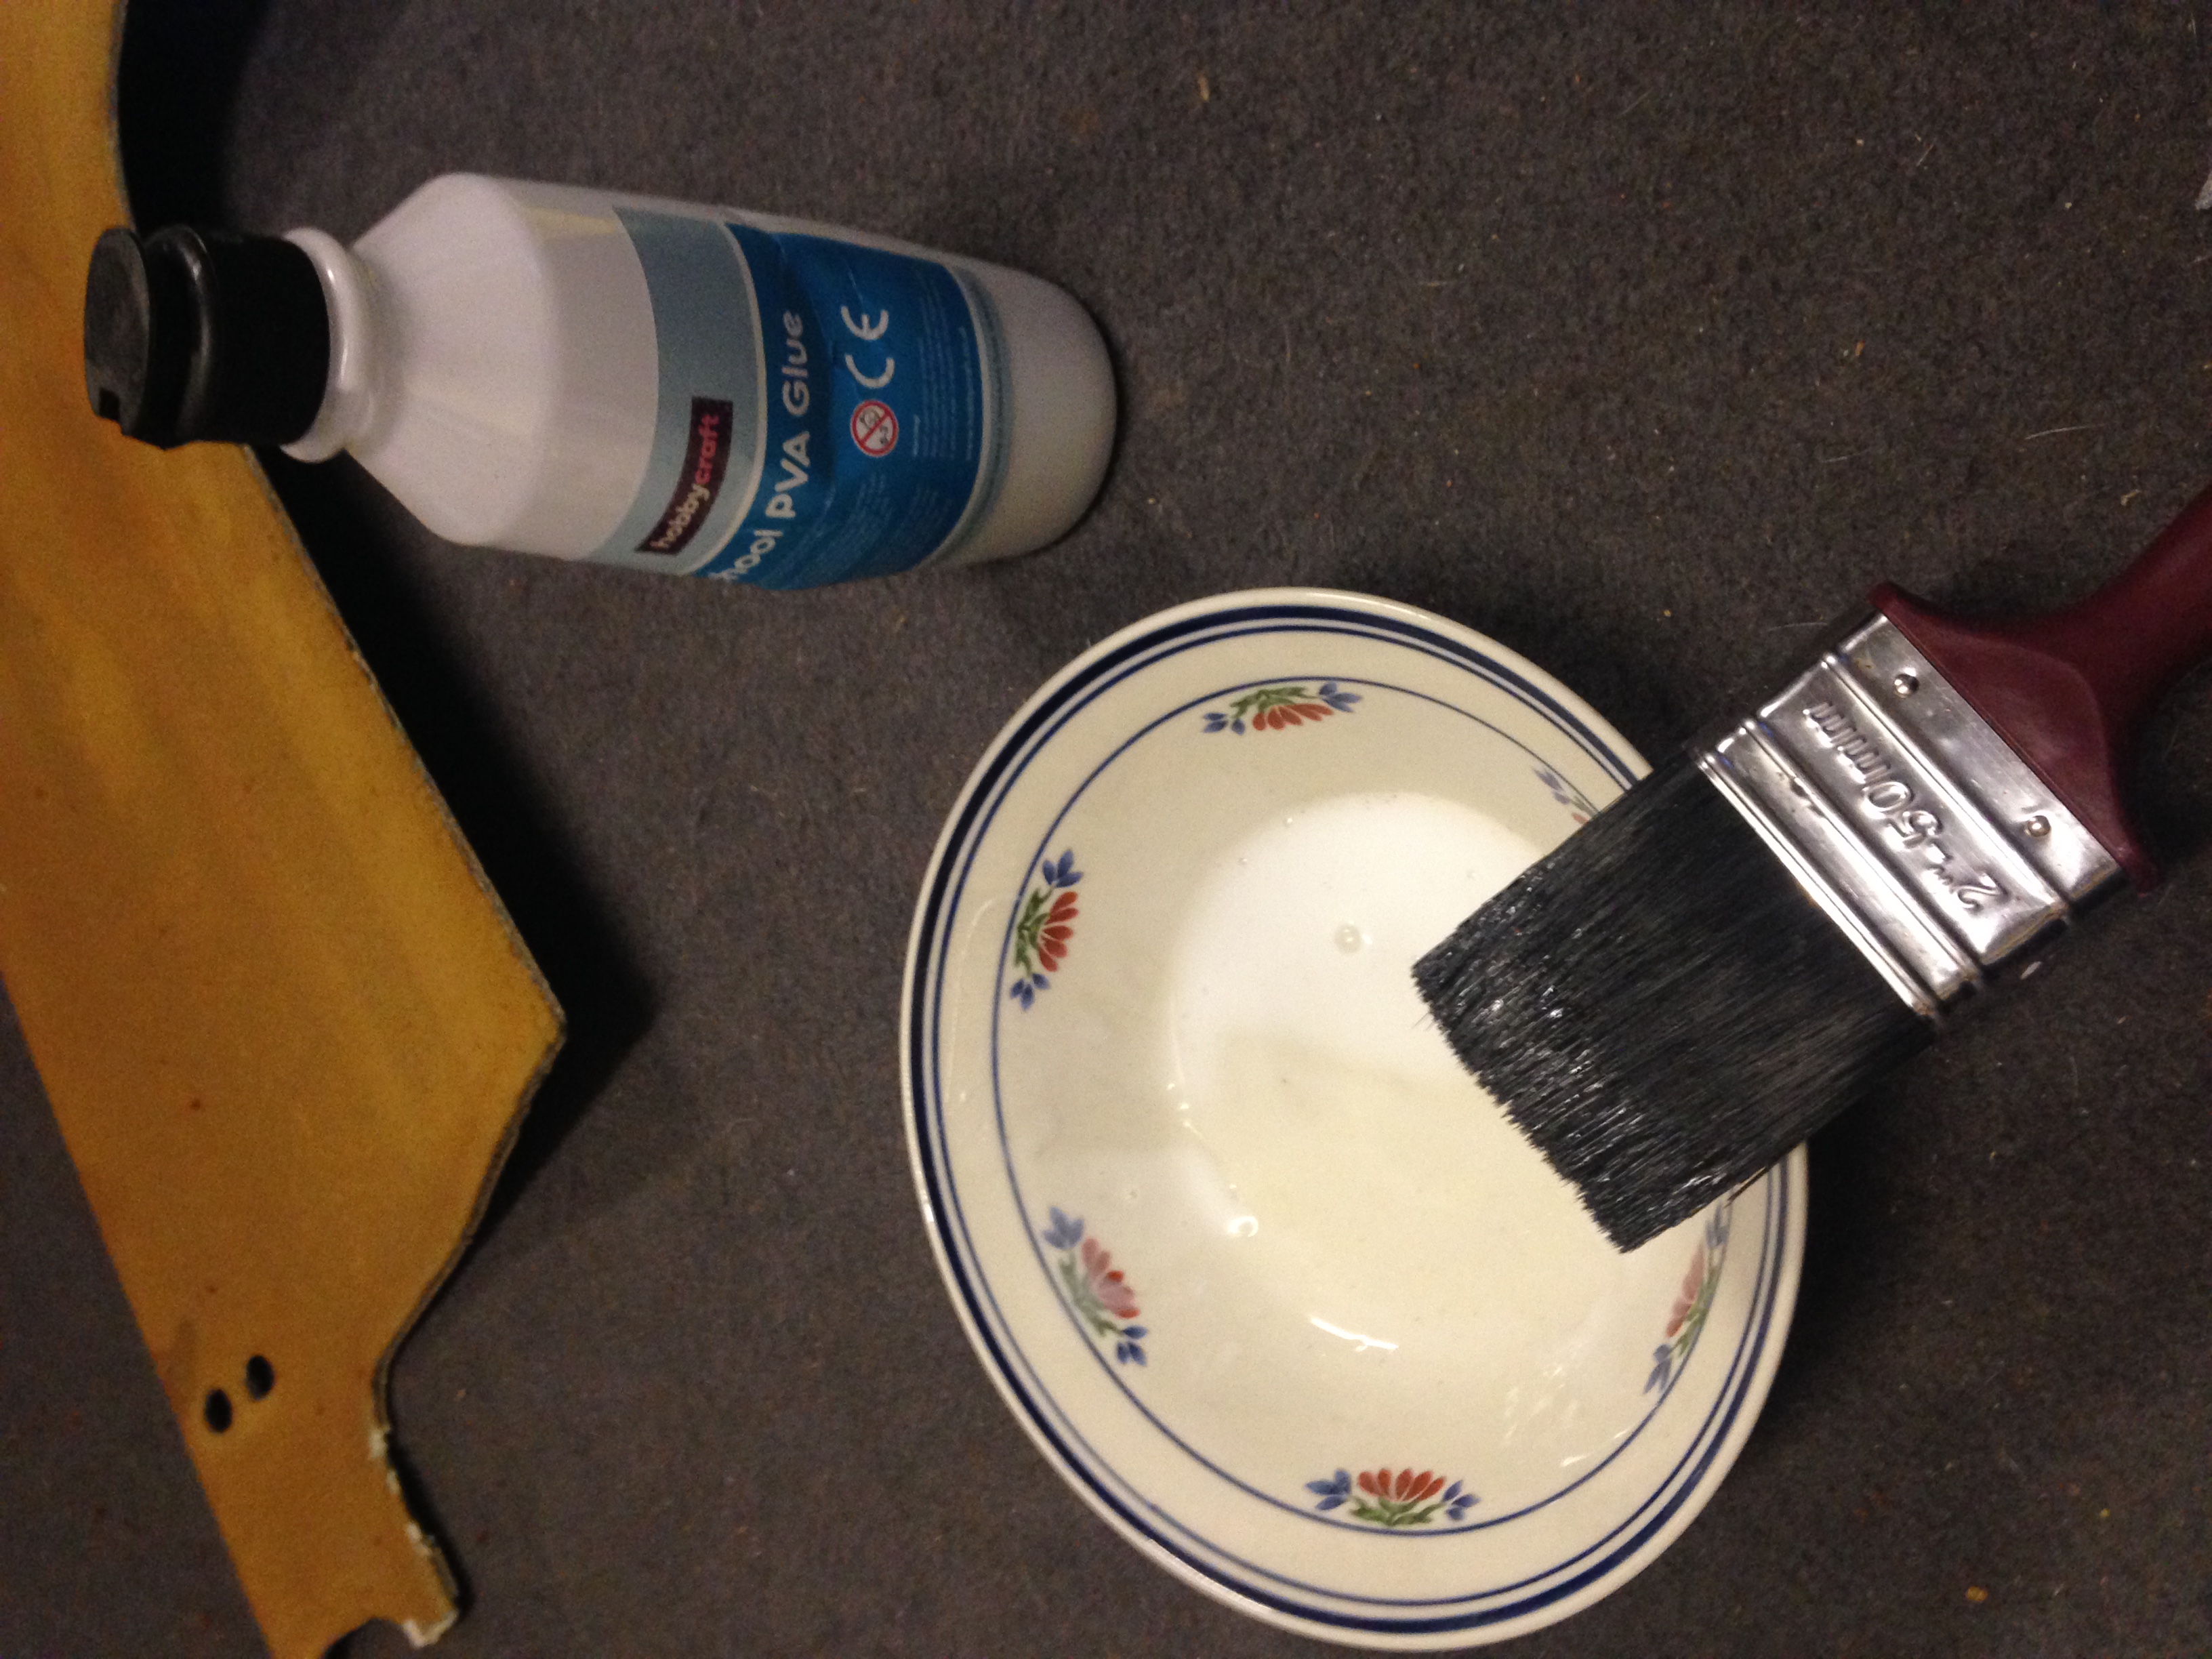
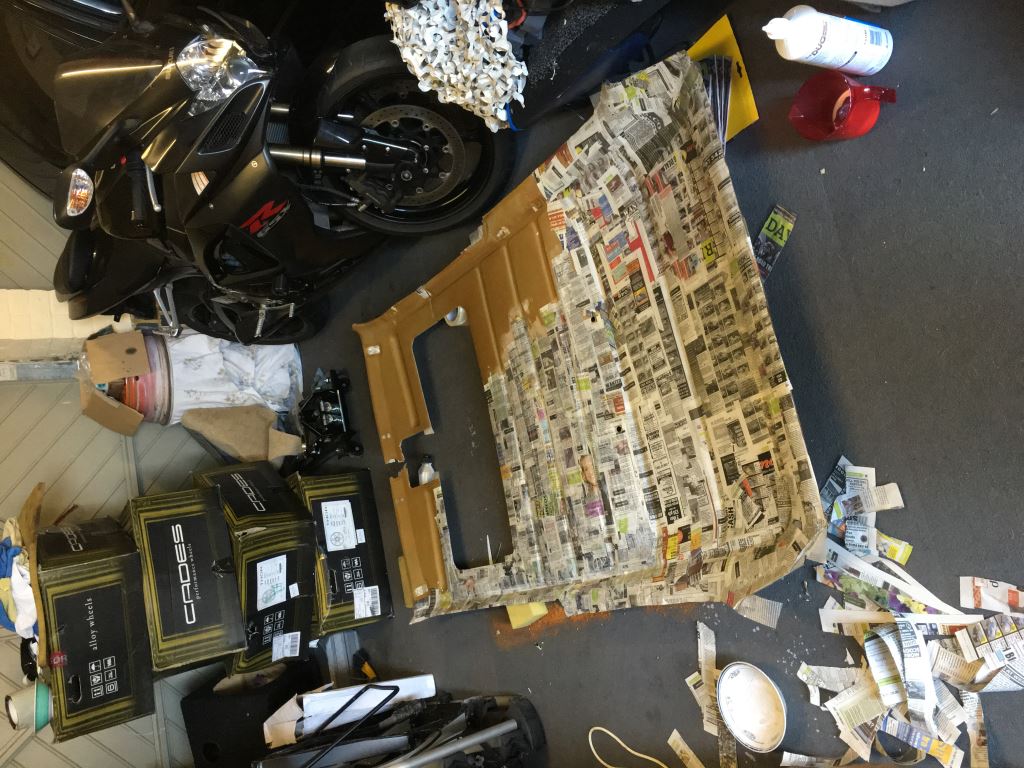
With the headliner board completely covered and dry, it becomes a lot stronger, and easier to work with. If you have any lumps in your paper mache then these can be smoothed using sand paper to help make the finished covering as smart as possible.
We would suggest having a few trial fits of the fabric onto the board before you start with any glue. This way you will see how the material fits into the curves, where you might need to apply some heat, and also how much you need to overlap to secure it on the other side – do this before you cut it!
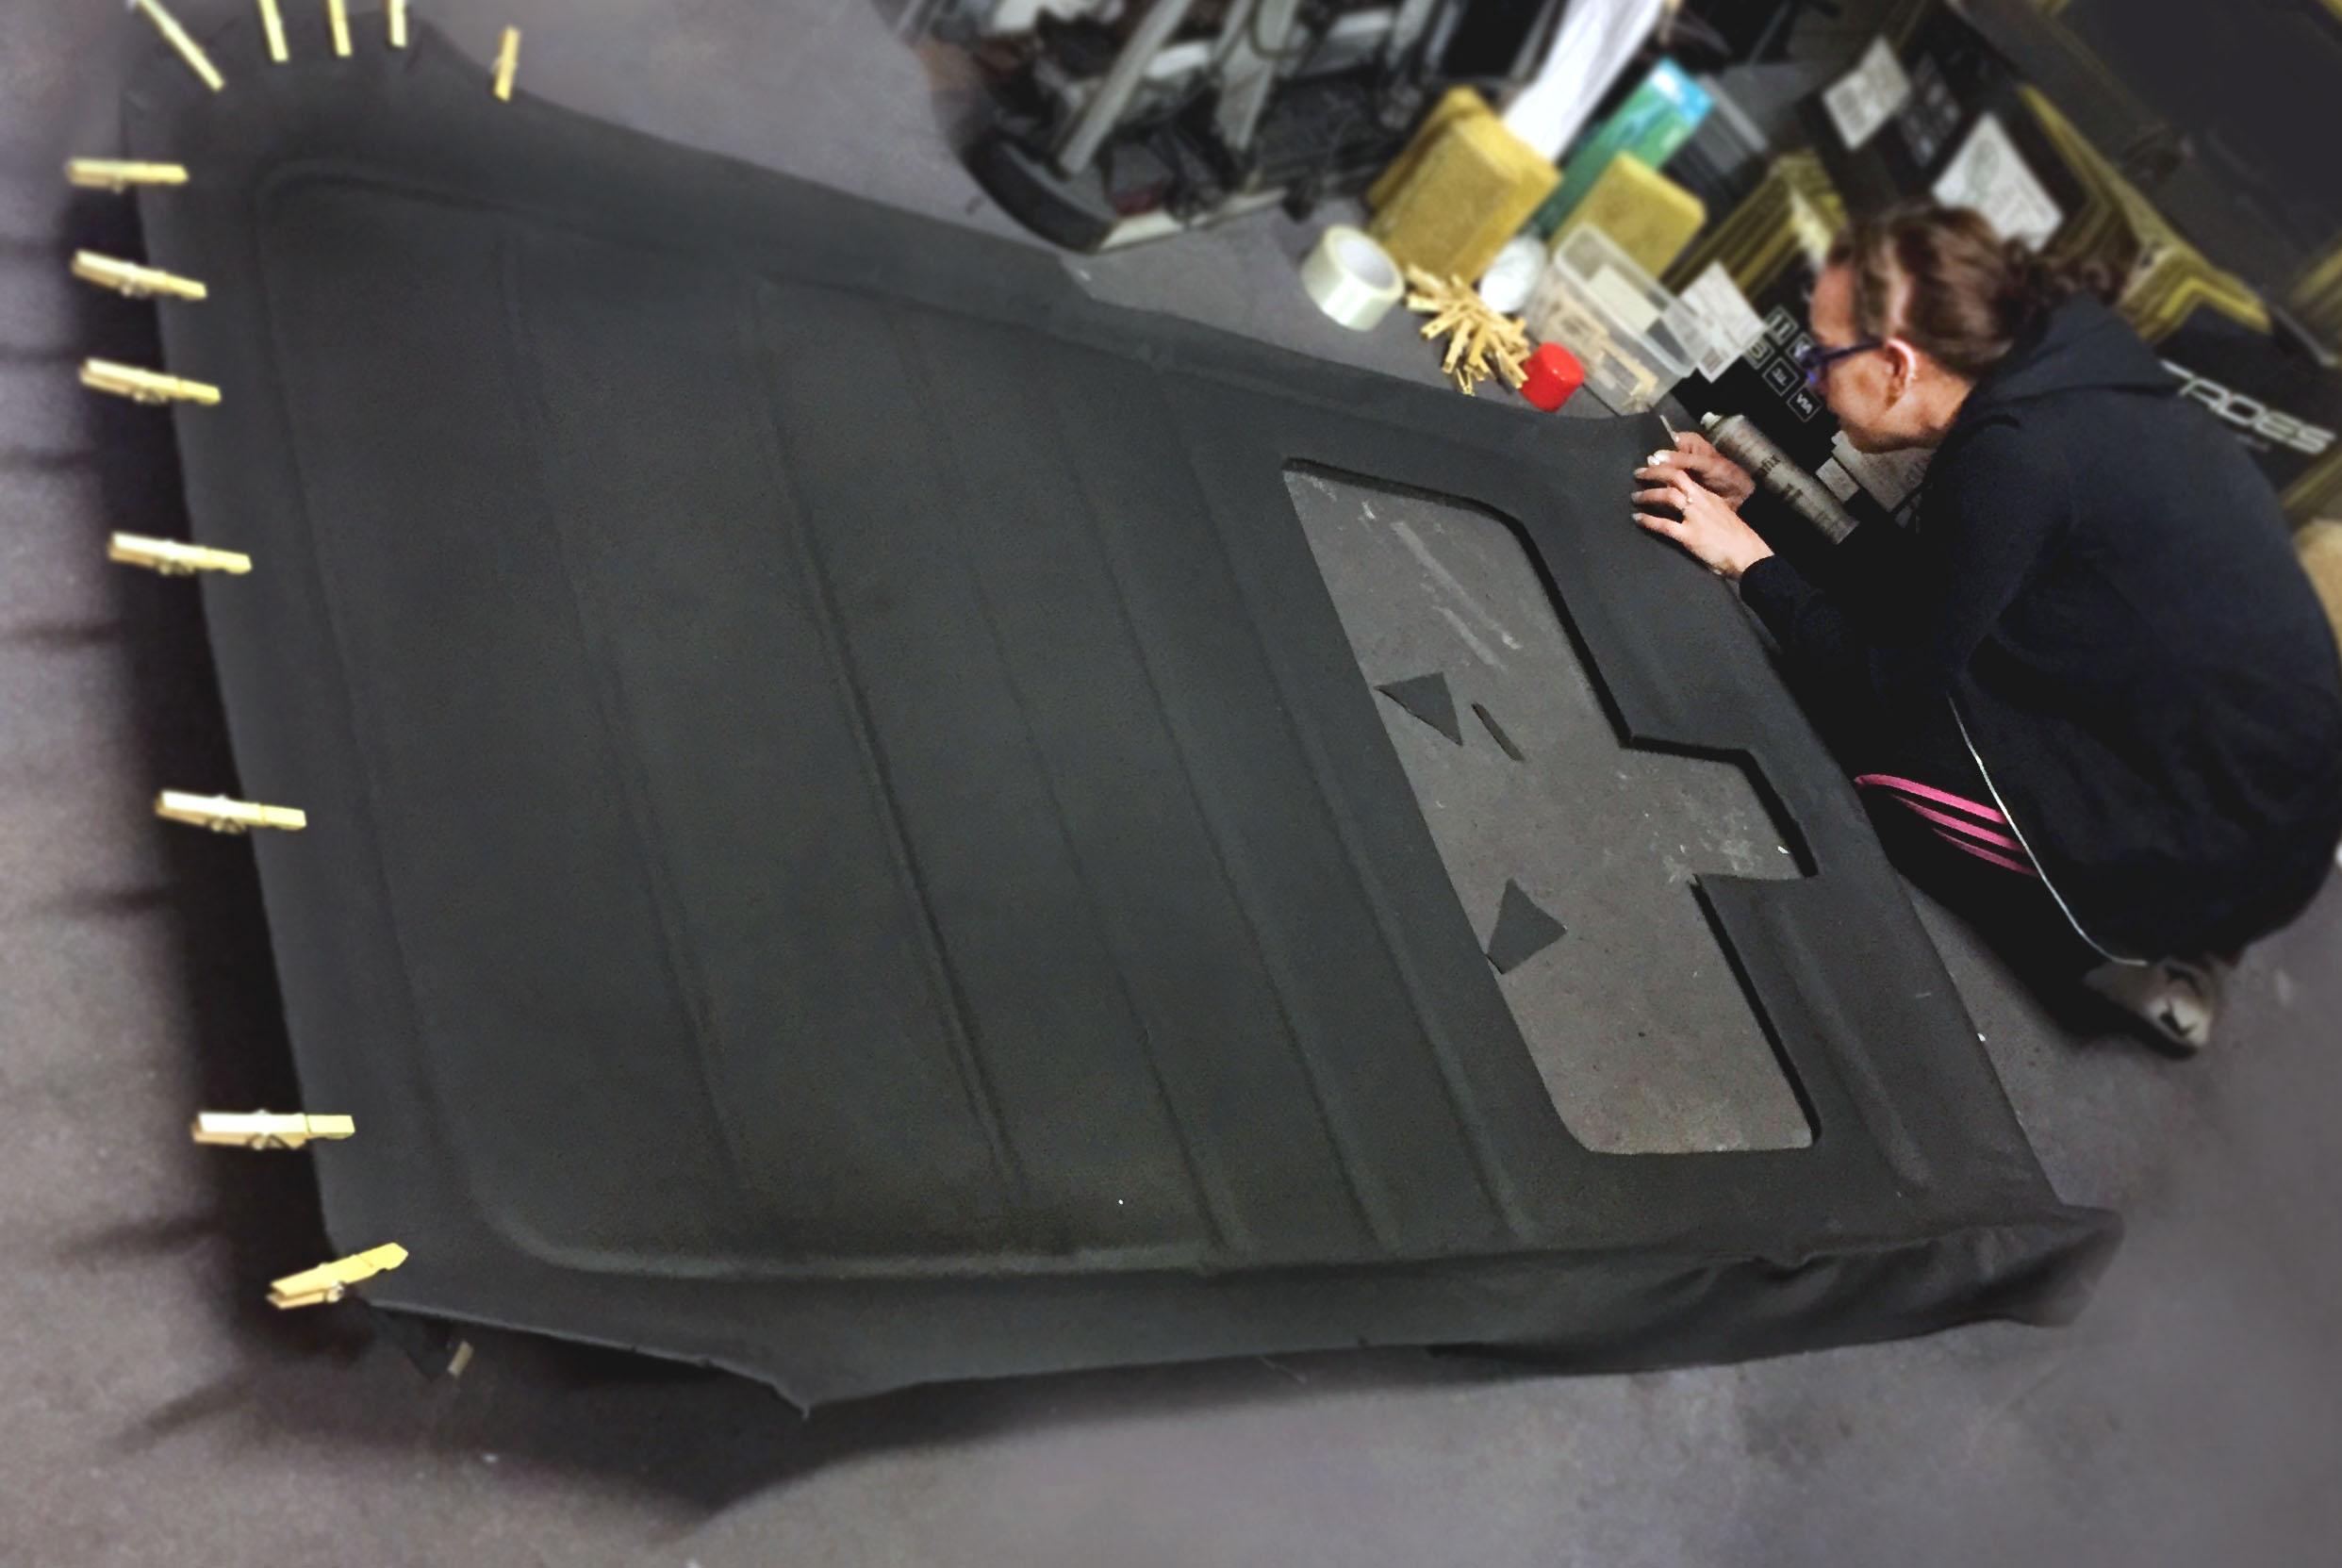
Anna chose to start her retrim at the front, applying the spray glue to both the headliner board and the material, allowing it go tacky, and then sticking the material into place. You may find the spray glue shows through the fabric in places, making the material wet, don’t panic, it will dry and disappear.
Where required clothes pegs (or similar) can be used to keep corners in check while you move on to the next bit. Working the material into all the ridges is important to ensure the glue holds tight.
The ‘dip’ above the rear passengers heads is the hardest part of the task. We would suggest you start in the middle and work outwards, glueing small areas at a time, and applying heat (at a distance) to help stretch the material to shape. As you can see from the photo above, if you take your time it’ll look pretty good.
Want to give it a go? You can find the Mk2 Golf headliner kit on our website.
Andy / Anna
The opinions expressed here are the personal opinions of the author and do not necessarily represent the views and opinions of VW Heritage.
This is great will definitely be giving it a go
i’m giving it a go right now! Board has been fixed back together. Now at the stage of applying the material. Any further advice to the above gratefully received.
Let us know how you get along.
Well it went ok the new material is not foam backed so does show up imperfections in the board easily. We spent a lot of time preparing the surface to remove all the previous glue so there should be no problems with the new glue. We found it difficult when you get to the passenger part of the roof, especiallly near the final corners. This required use of some heat to stretch and reduce otherwise you get crinkles. The match of colour is great you don’t need to do the sunroof or the sun visors if you wish. Sadly after 9 months and some warm weather the glue has given up and the lining sagged badly. I’m now going to switch to a foam backed material and search for a better glue. It seams professional companies are not likely to tell you the glue they use so it’s going to be interesting.
does anybody know if the original material came with no backing or some foam? i have no clue what to do. im guessing if you use foam it shouldn’t be too thick especially for sunroof models. also it would seem with no foam its going to be that much harder to get a smooth appearance after scraping and cleaning and repairing the foam headliner board.
i have tried to read a bunch about application and i’m seeing that allot of shops don’t use the glue in a can so perhaps you can’t proper application with it? i see shops using Dap Weldwood Contact Adhesive – Landau Top and Trim HHR with a spray gun that hooks up to an air compressor. if you took this project outside maybe on piece of plastic to catch overspray and used this method i could see putting on even coats that mist on vs. all the spurts and spotting with a can.
also make sure to follow directions for glue. some may just jump in and flood glue and go but i think these applications you want to spray both sides and allow to dry a certain amount of time, etc.
Hi Stanley, originally we believe the material was foam backed. Unfortunately this was not possible when we produced the new version. As you say a very thin layer of foam could be added to help hide the imperfections in the board.
It will be important to choose the correct type of glue. Something that is happy functioning in high temperature, and also if it is a contact adhesive is allowed to go tacky before the two surfaces are bonded.
We stock this spray glue to do the job. https://www.vwheritage.com/191867501glue-spray-glue-for-headliners
Hope that helps.
Andy
Hi Andy. I used the glue supplied by VW heritage. Sadly it doesn’t last when the temperatures warm up.
Hi Andy/ Anna , just wanted to say I bought the replica Mk2 VW Heritage head liner and was EXCELLENT .
Sanded off the old foam , fibreglassed up the disintegrating backing and bought a modern version foam from local detailers for factory spongey look. I may be wrong, but I didn’t fold the material around sunroof cut out and glue – which the above pics look like in the blog- but left a cm over-hang and contact adhesived to the metal sunroof lip on the car body and covered with the factory plastic seal . It takes longer but gives smoother finish where the sun roof meets the body cut out
Thanks for taking the time to give us your feedback Simon, I’m pleased you have managed to make a good job of repairing your old one.
We’d love to see some photos of the new headliner in situ. Please email social@vwheritage.com
Andy
Hi Simon. Can you tell me what type of foam you used and how thick it was? I want to recreate the original feel to mine too. Thanks.
i’ve tried this method using a mixture of pva mixed with water, when it dried out the paper shunk in the grovescausing a gap between the paper and the roof lining, is there any advice you could give me? or was it just pva you used and not mix it with water?
Hi after removing the foam with the sandpaper did you just paper mache over the glue left on the headliner cheers Tony
Yes, pretty much!
Nice job! I was wondering if anyone knows the measurements of this headlining board? For 3 Dr sunroof mk2 golf as I am getting someone to make an alcantara headlining for me. Thanks!
A buddy of mine has a MK2 Golf just like this and his headliner is pretty bad. I’m going to see about helping him soon to see about replacing it. I really like the way you strengthened up the OEM one so we’ll probably give that a go and see what happens.
Hello from cyprus
Great job i have a golf mk2 i got my car 1 year ago it did not have a headliner i couldnt find one my car is 2 door with sunroof, could u guys please give me tge measurments of the headliner ill try to make one on my won thanks
It would be very complicated to make, due to the moulded shape. However, we can supply a full, complete headliner, ready trimmed that has been produced by a supplier of ours. They are about £700. Alternatively, try and source a used one, even if you have to stick it back together and recover it.
Hi. I need a new hdeadliner for Mk2 1990 with sunroof
Where can i get one and who.can fit it ?
Thanks
Hi there, I am halfway through redoing my headliner. I have used a fibreglass kit to repair the shell and have bought the foam from Woolies as mentioned in the video. It looks fiddly but hope the effort will be worth it. I have bought the headliner material from Heritage following recommendations.
Forgot to,post a link to the video I mentioned. Here it is https://m.youtube.com/watch?v=5AeNDNnShPU