The air-cooled VW’s flat floorpan is one of its most distinctive features. It’s probably also the source of the most headaches when it comes to tackling rust. Here’s a warts ‘n all guide to this essential but troublesome piece of Volkswagen heritage…
The fact that water somehow seems to get in to old Beetles, either via worn or missing window rubbers, leaky sunroofs or holes in surrounding sills and heater channels explains why it is common to find mini oceans, complete with waves, in your footwells. Okay, so that’s probably a bit of an exaggeration, but let’s just say damp carpets and a general musty smell inside is all part of the early Beetle experience.
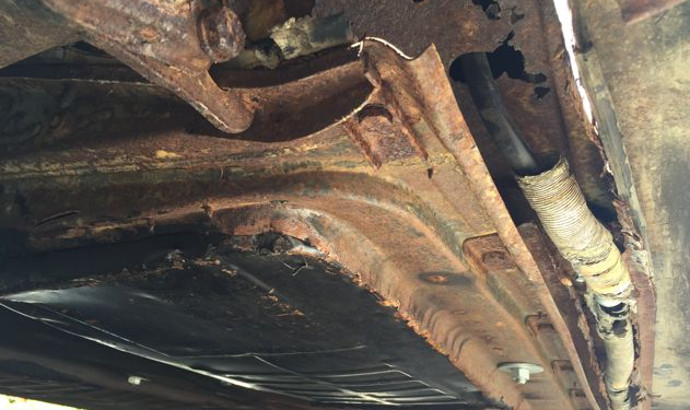
The worry with so much water slapping around, of course, is that the ‘pan will eventually rust through. Needless to say, the factory-fit tar board sound deadening only serves to trap the moisture and further encourage corrosion. Moreover, because the battery sits under the back seat there’s the added likelihood of acid leaks eating through the metalwork as well.
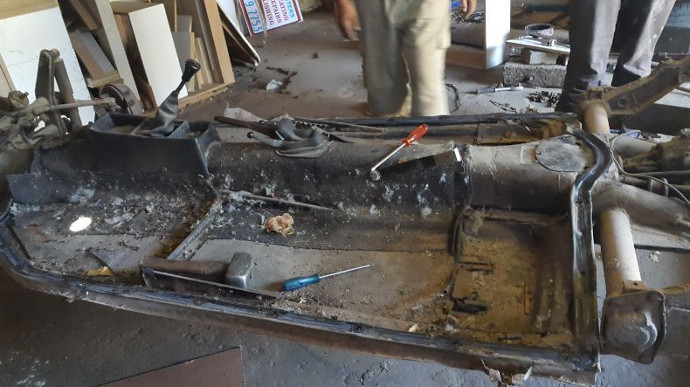
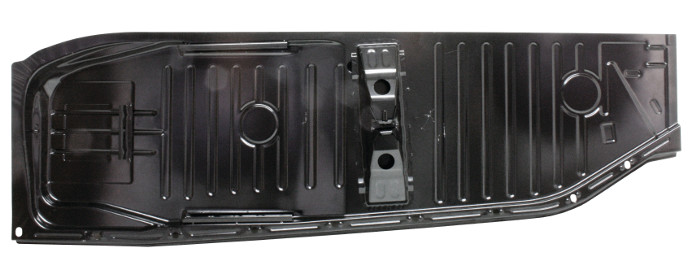
Inevitably, the floorpan seems to rot most around the edges. One solution is to patch it up, but on a badly affected car this is rarely the best solution. I know because I once bought a ’65 Beetle that needed lots of floorpan work. Needless to say, I didn’t know quite how bad it was and the vast amounts of money I lavished on paying a welder to give it the ‘patchwork quilt’ treatment would have been much better spent on a new floorpan. Not only that but it looked awful! You can see the full range of our floorpan sections here.
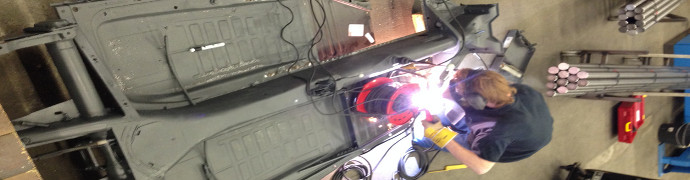
There’s ways to cut out the old floorpan with the body in situ, allowing you to weld in new metal but to be honest that’s a rubbish way of doing it. If you want to do it properly, it’s a case of removing the body and replacing the whole floorpan, complete with seat runners and other fittings. In theory, the body can be removed from the chassis in an afternoon, although you have to allow time for the usual seized and sheared bolts! There are nine 13mm bolts along each side holding the body to the floorplan and two 17mm bolts at the front. Inside the car there are four more 13mm bolts under the back seat and, depending on year, an additional two 17mm bolts in each corner.
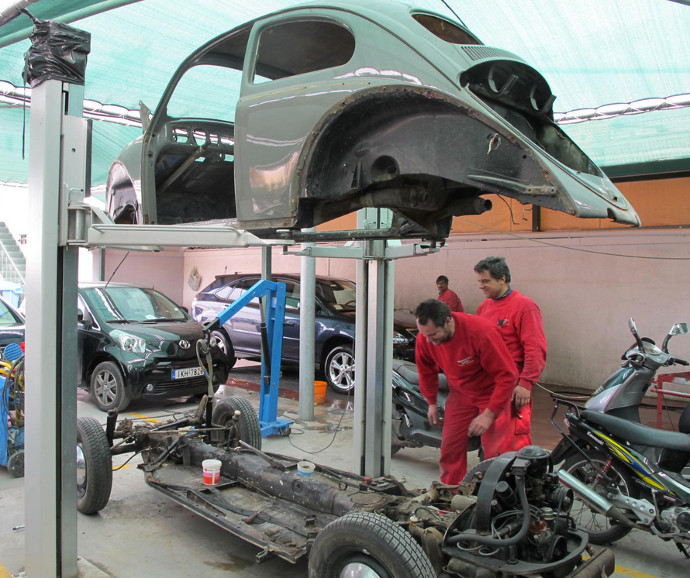
Of course you’ll need to remove all the seats first to get access. It’s then a case of ducking under the rear wings in order to undo the 17mm bolt each side in the bracket where the shock absorbers bolt to the body. Then it’s a matter of removing the petrol tank to gain access to an additional two 17mm bolts at the front of the pan. The steering column needs to be disconnected (either at the box or rubber coupling), the brake pipe from the fluid reservoir has to be removed and the speedo cable disconnected from the hub.
It’s possible to leave the engine in situ – if you want to remove it you’ll need to disconnect all the wiring. The procedure differs a little on the MacPherson strut Bugs. You can check out the various YouTube videos to see it being done – the one here covers most of it.
If the rest of the bodywork’s half decent, it certainly makes sense getting a solid floorpan in place as it will provide the foundation for the rest of the build.
Ian
The opinions expressed here are the personal opinions of the author and do not necessarily represent the views and opinions of VW Heritage.
sorry .. i realize this is not a sales forum.. please forgive me .4 sale 1970 vw convertible.. been a good daily driver..
https://medford.craigslist.org/cto/d/1970-vw-convertible-part/6630665928.html
very few folks in my area are savvy enough to see..